
A quick and easy introduction to the OmegaT scripts:
- OmegaT comes bundled with several scripts. Some of them are of little practical use as they are included as examples for users who want to write their own scripts.
- The bundled scripts are located in the
scriptssubfolder of the folder where OmegaT is installed. Often the installation is done in a location where a regular user doesn’t have write permissions, which means that adding and removing scripts can be complicated. - Luckily, OmegaT allows you to specify an arbitrary location for scripts. Do it! It can be any location where you can write to. It doesn’t matter if it contains no scripts at the moment: you can add only the ones you need, and only when you need them.
It makes sense to place the scripts folder in the OmegaT config folder (the folder where OmegaT stores its settings) just for convenience.
But of course it can be any other folder.
- Copy the scripts you need into the folder that was set up for scripts.
If you’re downloading from GitHub, you may need to view the desired script in raw format, and then save the page. If it saves asfilename.groovy.txt, just remove the.txtpart. If the file was saved in yourDownloadsfolder, just move it to the folder set up for your scripts.
- In OmegaT, open Tools → Scripting, in the newly opened Scripting window, select the script you need (left part of the window) and press Run (lower left corner).

- If you need to run a script often, you can assign shortcuts to up to 12 scripts:
• Select the script you want to run with a shortcut.
• Right-click on one of the 12 buttons at the bottom of the Scripting window.
• Select “Add Script”.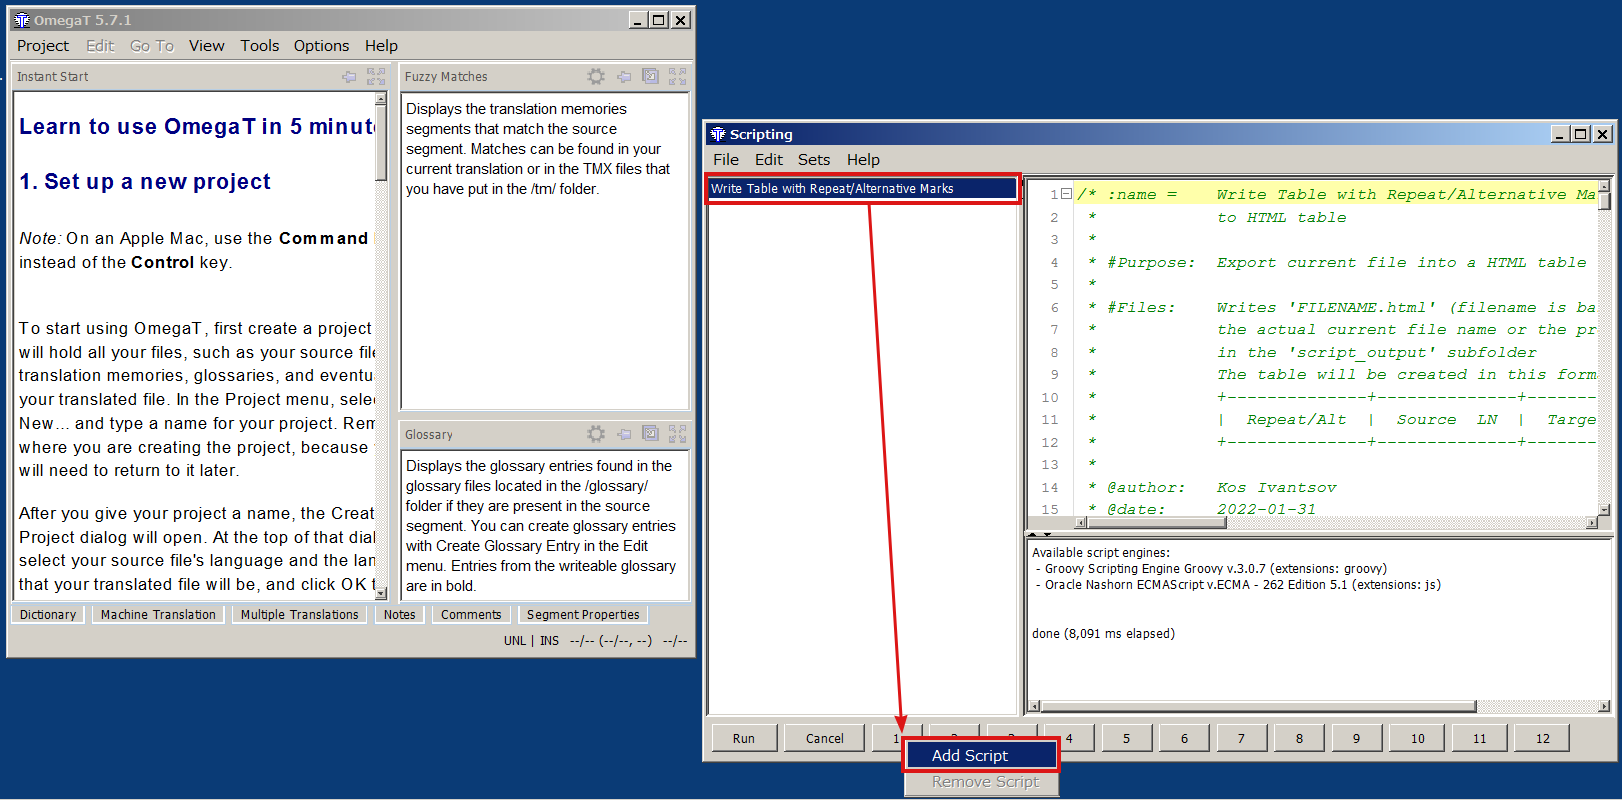
- The script thus installed is available in the Tools menu, or can be run by pressing Ctrl+Shift+Fn (Fn is a function key at the top of the keyboard, n is a number between 1 and 12, and the number on the button in the Scripting window corresponds to the number on the function key).

