OmegaT can launch external programs and scripts and pass certain project-specific data as parameters, and this is quite useful.
There are three ways to do this:
- External searches (global or project specific)
- Post-processing commands (global or project specific)
- OmegaT scripts
External searches can pass the text selected in OmegaT’s editor to the web browser as a URL to open. Such URLs consist of a fixed part (e.g. https://en.wikipedia.org/wiki/) and the selected text inserted somewhere in the URL instead of the placeholder ({target} in the External Search configuration). It’s also possible to open any other program instead of a web browser. This makes sense if the program you want to run is a dictionary application or other reference software that can accept parameters from standard input. An excellent example of such software is Goldendict.
What this approach lacks is the capability to pass other useful information, such as project languages or file locations. Not a big problem, especially if you are translating from one or two languages. But even with two, if you want to use a multilingual resource, it becomes necessary to create a separate external searches for each language, though the difference often is just a language code. There are ways to work around this limitation, but I’ll perhaps discuss that another time.
Post-processing commands have a much bigger list of supported variables, and they are great for tasks like file format conversion or live preview. Despite their versatility, these commands cannot receive input directly from OmegaT’s editor. Moreover, they only execute when generating target files, making them less suitable for tasks like lookups or note-taking that may need to be performed multiple times even while working on a single segment.
With OmegaT scripts it’s possible to execute an external application and pass almost anything related to the project: source and target text of the current segment, selection in the editor, paths to the various files in the project that OmegaT is aware of, project languages along with their country variants, current file, and more.
Years ago I did write a script exactly for that purpose, and I think it was my very first script in Groovy. It’s quite straightforward: it only collects a whole bunch of variables and passes them to an external script or app that can decide how to handle them. That external part was written with Linux in mind. GNU/Linux readily provides Bash shell (or a number of other shells to chose from) that makes it possible to combine multiple components into a practical routine tailored to specific requirements, and Zenity, a handy utility that simplifies the creation of basic GUI dialog windows for seamless interaction with Bash scripts. The concept was very simple: OmegaT gets all the needed variables and launches my Bash+Zenity script. This script, in turn, presents a list of various actions, and once a choice is made, the corresponding action is executed. It worked beautifully (at least according to my definition of beauty). Over time, the list of actions expanded, and I relied on it daily.
Recently I switched to macOS, and at first those thing were badly missed while working in OmegaT. But it turned out that Zenity is available through Homebrew, while Bash is already available out of the box. Thus, the only task remaining was making sure my old creation is compatible with both operating systems.
So here I present that combination now working equally well on Linux and macOS.
Nota bene:
<omegat_config> below refers to OmegaT configuration folder. You can access it by pressing Options → Access Configuration Folder in OmegaT.
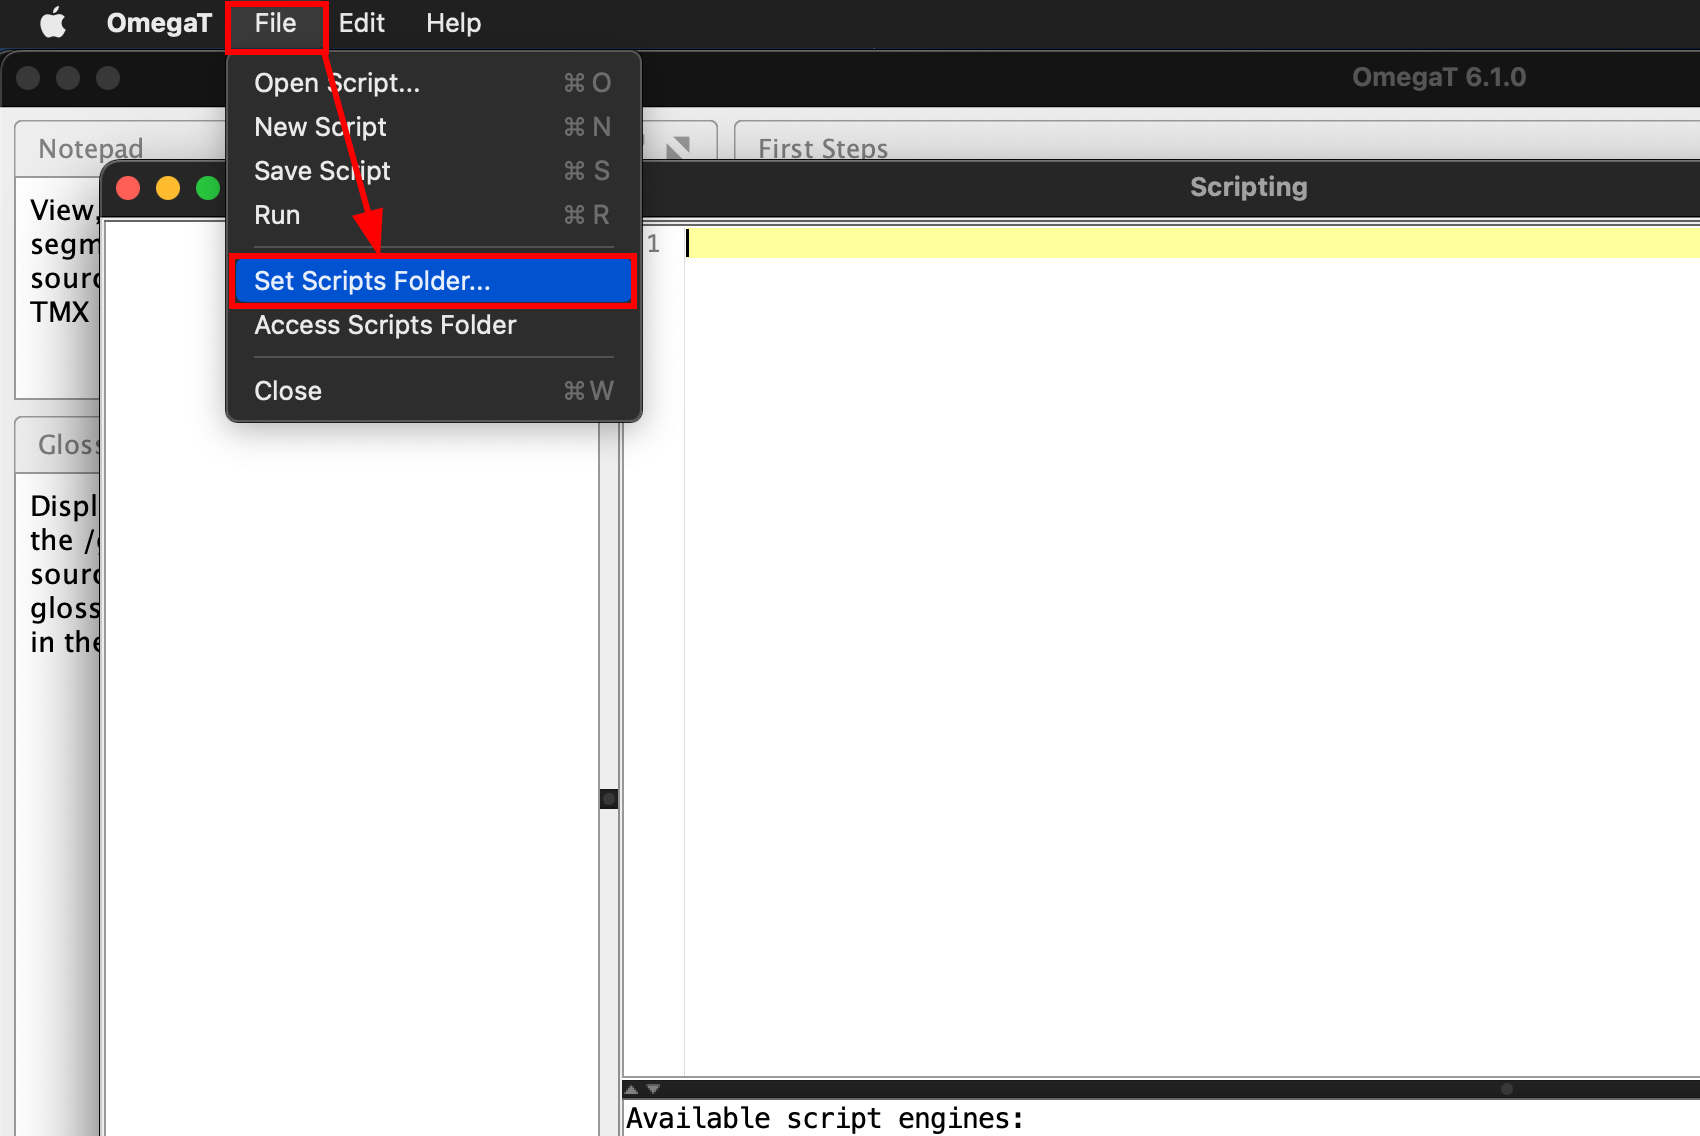
- If the window called Scripting that pops up by pressing Tools → Scripting is empty for some reason, you may want to go to
<omegat_config> and create a folder called scripts there (note the plural).
Then in the Scripting window, click File → Set Scripts Folder…, and select the newly created folder (under Linux and Mac, you can simply drag the folder onto buttons in the file chooser, and that folder will be selected automatically)
- Any new scripts should be placed into this folder. If you need any of the scripts bundled with OmegaT (there are a few useful ones), copy them over from where OmegaT is installed (
OmegaT.app/Contents/Java/scripts on Mac)
So, here we go:
- Add the Groovy script to your OmegaT scripts.
- The script is called
utils_external_opener.groovy, and it can be downloaded here and here.
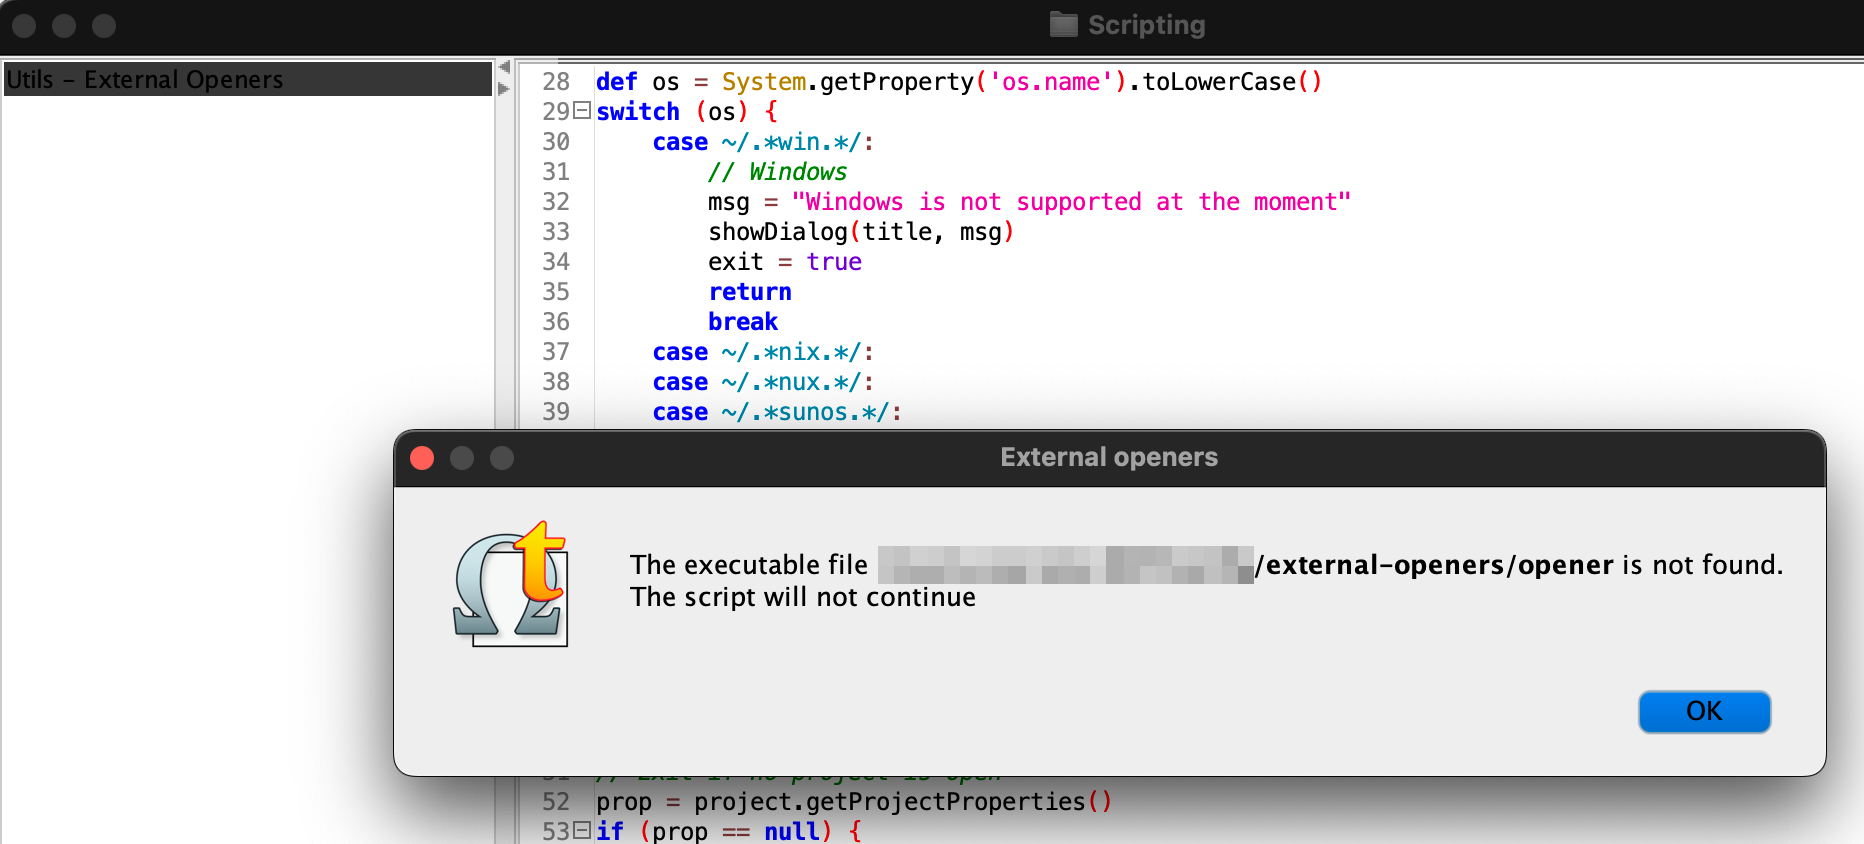
- The script expects an executable called
opener to be located in folder <omegat_config>/external-openers/. It will not continue if neither that folder, nor the executable is found. See p. 2 for details about that external part.
- When the groovy script is successfully run, it creates a file called
opener.vars in <omegat_config>/external-openers/. It is a plain text file containing the collected variables in this simple format:
variable='value'
- The script then executes
<omegat_config>/external-openers/opener and passes the location of the opener.vars to it.
- Copy my
opener to <omegat_config>/external-openers/
- To do so, download the zip file containing the external launcher from here or here.
Place the zip inside <omegat_config> and unpack there. It will create <omegat_config>/external-openers with the file opener. After that, the zip file can be deleted.
opener is a Bash script that doesn’t do anything useful on it’s own. It simply lists everything it finds in <omegat_config>/external-openers/actions/ via a selection list dialog (if you used the zip file, the subfolder actions/ and its contents were added too). Once the selection is made, the selected item is executed. Items under <omegat_config>/external-openers/actions/ can be scripts written in various scripting languages (as long as your OS knows how to execute them), or compiled binaries, but not application bundles.
- I offer three such action scripts: “Open Directories”, “Rename target files”, and “Web Lookup”. “Rename target files” asks several questions when it’s executed, the other two present further list (but that’s as far as the lists go in the bundle I here present). The Web Lookup works with the selected text, or, if no selection is made, with current segment’s source text. Wikipedia languages, and DeepL and Google language pairs are taken from the current project language settings.
- Make sure that
<omegat_config>/external-openers/opener and everything under <omegat_config>/external-openers/actions/ is set to be executable.
- Make sure Zenity is installed.
- On macOS, you may need to enable Homebrew and install Zenity with
brew install ncruces/tap/zenity
(this is a Zenity rewrite that doesn’t depend on GTK+; I haven’t checked the GTK+ version available through Homebrew and Macports.)
- On Linux, Zenity is most likely already installed, but if not, just install it using your package manager.
- There’s Bash and Zenity for Windows, but there’s no time whatsoever to make sure this setup runs on Windows too. If anyone is interested to check and adapt it as needed, I’ll be happy to incorporate their findings.
- The script described here makes the following OmegaT info accessible to the external opener:
- selected text (if nothing selected, the current segment’s source will be used)
- URL-encoded selected text
- current segment’s target
- URL-encoded target
- current segment source
- URL-encoded source
- project’s path
- path to the
omegat subfolder of the current project
- path to the current project source folder
- path to the current project target folder
- path to the current project tm folder
- path to the current project glossaries folder
- path to the current project dictionaries folder
- path to the current file open in the editor
- path to the writable glossary
- path to the OmegaT configuration folder
- path to the OmegaT scripts folder
- source language code
- target language code
- source language country variant
- target language country variant
- source language name
- target language
- language in which OmegaT is run
If you have questions, you can always leave them in comments. Happy translating!